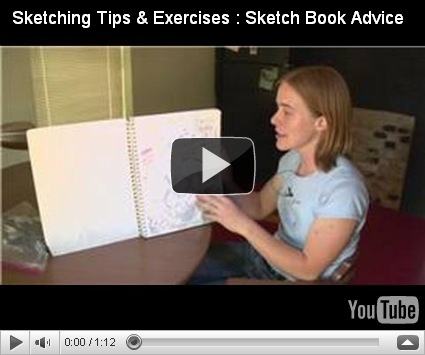
Watch this video from miandza. I like it.

Here’s tip for beginners on how to draw comics.
To begin with characters can be animated to take a picture. But the most important things to remember one of, if the model is the first time to train. The more you practice, the most qualified will be done. If you draw caricatures of destination, there are a few tips you can use to start it should.
If you're a cartoonist go to the drawing tools are always right. When you select a drawing tool, you can choose from a pencil "H" pen and "B". The difference between these two pens is the pen "H" is generally easier than the "B". Depending on the particular application, you can also choose from a pen "HB". This pen is usually between the "H" and "B" and produces graphite, which is located between the soft and dark.
You have the right drawing tools, you need a sketchbook and pencil eraser. You can easily take a sketch book for each store. In selecting the appropriate rubber, isbest to buy a mix. These tires can not in any way that you need to make proper use will be formed.
For many beginners, and also a straight line is a difficult thing to do. For this reason, it is recommended that the pencil is not as close as you normally would, keeping to the letter. Loosen the grip and drag flicks. If the lines are not accurate, you can go back at any time and delete the unwanted lines.
Another good tip is to take some drawingBooks from local library. these books can help you with help, learn the basics of drawing cartoon characters, as with simple forms for your character in your head. Try to go through at least three books a month subscription. Do not rush through it through it. Find out at a steady pace and try to improve your drawing skills daily.
The most important tip to remember is that drawing cartoons is not based on skills alone, is based on fantasy. When drawingCartoons, it tells a story and express your thoughts. Even if you are drawing stick figures, you're still express your thoughts and ideas. The design must not be perfect, to draw what comes to your imagination.
Note that you can take a long time to learn the basics. With the right practice and patience, you can easily become the final master of caricature drawing.
Above tip on how to improve your sketching.
This is a rough picture or drawing with the most important information on your topic. The purpose of the sketch is a brief look at how the elements of the layout of the page. Elements such as character actors, image design, lighting and
total color palette to name a few. Let us until the end ... should we?
Sketching is a personal thing. What works for one might not work for others. You can sketch with any medium. Lead, pastels, paint, conte sticks, etc. Some pencils can be described as “sketching pencils”. They have a harder lead , requiring more effort to produce dark lines. Pretty handy if you’re trying to keep your lines nice and light.
Sketching is experimental in nature. Making a mistake at the sketching stage of an illustration is better than noticing something wrong once the piece is completed.
This stage of your drawing is the perfect time to lay out a solid foundation to work from.
A lightly drawn line is easier to draw over (or erase) and allows more room for trial and error.
Keep sketching until it’s purpose has been served. If you were sketching to check a layout or to test out a color palette, once you have your answers, you should be ready to move on to the next step.
Let’s watch this video. Try product from the bottom of this blog under sponsor links. ^_^

Watch this video on how to sketch materials. Read and try product from the bottom of this blog under sponsor links. ^_^

These are some tips of sketching.
1. A drawing in his sketchbook whenever you get a chance, and while waiting for food in a restaurant or any place that you can track people. Just do not stare not directed at them or they might feel uncomfortable, take a quick look at the materials and test / develop your memory.
2. Draw your subject using simple shapes, and exaggerate the persons characteristics as well as their gesture. Don't just try to copy them exactly like you see them, your sketch will appear boring. Your sketchbook is your personal workspace, try not to share it with people, it will allow you to loosen up and not worry about what people might think of your work.
3. Make it a habit to search for photos of people, animals, locations, clothes, hairstyles, in magazines or books or use your computer to search google or flickr, those are a few great places to start. Make a library of all the images you've gathered. You'll never know when it might come in handy. But keep step 2 in mind.
4. Be patient. if your drawing doesn't come out right the first time try it again. Don't get upset or frustrated,
have fun.
5. The more you practice the better you will become, this is why keeping a sketchbook handy is important, you will also get a chance to look back and view how much you've been progressing.
6. Your sketchbook is also a place to take important notes that will help guide you in the field, such as, Ideas, inspirational quotes, or tips!
7. Suffering from Artist Block? the remedy is simple, pick one of your handy photo references you so neatly been collecting and start to draw from it. ''Action always generates inspiration". Jump starting yourself helps get those juices going.
8. Select a sketchbook size that best suits your travels,
my preference is a Pentalic 6x8 it offers the personal stealth feel Im comfortable with when in the field sketching my subjects. Of course choose what feels best for you.
9. If you have trouble drawing something, do not neglect it. Instead practice filling a sheet of paper of what you feel you need work at. such as hands or feet, just remember to have fun with it be quick and eventually you will master it I Guarantee!
Above some info about it.
As everyone knows, there are a variety of styles design, attracted artists choose to use. Each artist has decided to choose his own style. They can adapt existing forms of training, but somehow, each of them has its own style. They have already decided to make the media design. Some of them decided to focus on self-sketch style drawings to make a plan.

For them, this is the best way to express their feelings. They would be able to show the “soul” of their drawing results in the sketch drawings. It’s a very simple way to make an excellent artwork results. It would give them some sorts of excellent satisfactions than the other kinds of media. Sketch might only have the simple results, but somehow that simplicity simply talks much.
The sketch drawings might only shows some lines. Usually, the drawers only used the pencil to draw. But somehow, the simple scratches of the pencil could form some excellent results. The simple sketch sometimes talks more than the complicated painting artwork. For some drawing artists, it’s the kind of excellent artwork that really could give them “something” that they would never get from the other kind of drawing media and styles.
As I was writing the above article,
Some info about it.
As we all know, there are many kinds of drawing styles that the drawing artists have decided to use. Each drawing artist has decided to choose their own styles. They might adapt the existing drawing styles but somehow, each of them has their personal style. They have already chosen the media to do the drawing. Some of them have decided to concentrate themselves on the sketch drawings style to do the drawing.

For them, this is the best way to express their feelings. They would be able to show the “soul” of their drawing results in the sketch drawings. It’s a very simple way to make an excellent artwork results. It would give them some sorts of excellent satisfactions than the other kinds of media. Sketch might only have the simple results, but somehow that simplicity simply talks much.
The sketch drawings might only shows some lines. Usually, the drawers only used the pencil to draw. But somehow, the simple scratches of the pencil could form some excellent results. The simple sketch sometimes talks more than the complicated painting artwork. For some drawing artists, it’s the kind of excellent artwork that really could give them “something” that they would never get from the other kind of drawing media and styles.
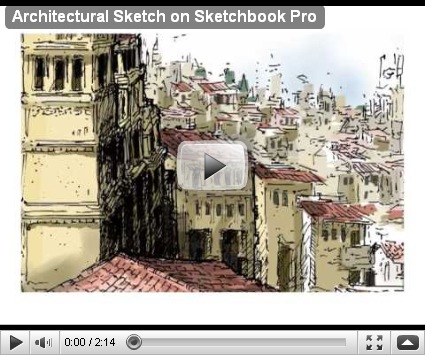
Above a video about architectural 2 point perspective sketches by Raison Bassig. Enjoy this video.

Above about how to sketch.
Have you ever seen sketches either from an artist's sketchbook or in a gallery and there drawings always look really sketchy, there's something about them that you really like and want to emulate. Sketching isn't about drawing a likeness in a portrait or drawing things accurately, sketching is about being loose and bold and not worrying about making mistakes, letting your real feelings come out.
 The whole point of sketching can be done in two different ways, one way is sketching as a preliminary to a painting or a finished drawing, the other way is just for the art and fun of sketching which if done properly can really turn into a work of art by itself. The sketch on the left is full of life and energy and you can only achieve this dynamic and rhythmic flow through sketching whether it is with watercolour, oil, charcoal, acrylic or any other medium.
 In this detail of the same sketch we can see all the scribbles and marks that I have put down and each mark or scribble means something whether it is the form of the hair or the way tone has been laid in. The detail looks abstract in this example till we see the full sketch and then realise that everything is there that needs to be, look at the full size sketch and you can see what these marks and scribbles describe.
 To do this sort of sketching you need to relax and let yourself go and not to be afraid of making mistakes and to have an understanding of form and shape. Once you know about form and shape try letting yourself go and lose all your inhibitions and preconceptions of what you might think drawing is all about. The example on the left is a simple sketch that is fluent and rhythmic, I wasn't really bothered about toenails or whether there was an highlight in the dogs eye. This sketch took two minutes to do and it is a good idea to set yourself a time limit to see what you can achieve.
Here are some of sketching techniques.
# Sketching is a way of freehand drawing, Detailers, designers, engineers, architects, engineers and industry to record their ideas on paper quickly, without allowing the use of tools. The moment they began their ideas, they can change and refine their sketches for presentation to their superiors or customers. Sketching is also helpful in planning a drawing or layout before using the tool.
# Sketches can be done in any kind of paper, white bond (preferred), newsprint, tracing paper napkins or transparent. White papers with light blue or gray grid lines in different grid sizes OF1 / 4 ", 1 / 8" or 1 / 10 "is helpful for beginners to design something the correct size. angled grid for isometric, oblique and perspective views are available for three-dimensional work.
Here about Sketching eBook.
Sketch fast, fun for all, and this book guide includes all the principles: Find the right handle, select the appropriate ink, paper, printing and match Washington's, Let's Go sketch technique, using loopholes to signal new brushes and water brushes, watercolor paints Let's Paint, Washington, DC, to check the color ink wash, choose a theme, identify open technologies that work in the studio, working on links, photos, ways to improve their drawing skills, learn the basics of drawing perspective, study proportions of the human body, Take A Sketch group or class "Rate your outline, the history of drafting more about vintage pens and communications network.
Click the following link to look inside the book, read some of the pages, and check the contents. http://www.peninkwat...h-sketching.htm
Purchase the Ebook with your credit card and our secure shopping cart for $5.95 and immediately receive your password to download, no delivery charge.
How to sketching people.
If you know where to start, sketching people always easy to make! This simple step-by-step drawing one character to reach a target is easy to give a few tips to help!
In this example, only a pencil and paper is required. Check ink drawings, if they wish, but in this study!

The first step is to create the head of your character. Try to make an oval shape (not too irregular, if possible) and add two lines on the face to help you determine where the nose, the eyes and the mouth will be located. You can also sketch the shoulders and the upper part of the body.

Once the first step is completed, add the neck and the arms to your character. You can also start to refine the outline of your character and add some darker lines.

Now it's time to add some details like the ears, the nose, the mouth and the eyes. You can also sketch a shirt on your character's body

Finally, add the remaining details like the pupils, the hair and the eyebrows. By now, your character should be partially complete and ready to receive shadows and textures.

Add these shadows and textures on your character. For this exercise, remember that you don't need to ink your drawing. The goal is to work with your pencil and master all the aspect of this important tool.
Don't hesitate to repeat the steps above using different characters in order to practice yourself! Have fun!
Above about oil pastel technique
Step: Selection Pastels
Efforts should be the first thing to choose pastel. Offers a variety of different sizes and brands in the market, the pastel. Approximately 120 tonnes will be built, a series. However, only begins a series of 24 profiles. This should be enough, because all the tons and what tests are needed to help you too much not to confuse. Important to application, but can now go to a range of pastel.
If at any time, see the view by the pastel. Pastel or small craters and the bad of them have holes in poor quality. This is still bright and choose. Pastel Artists for quality, not selectively to those who have rejected the students. Grade students are very angry about it harder in general pastels and blending. Despite all this, mostly through trial, a pastel-type, the best way to interpret the specified style.
Second Step: A selection of the canvas
The draft will be in a canvas surface on their images. The best selection of the artist's ability to represent a flat surface, so it is very important. There are many types of paper on the market. Different artists according to their needs, you select different paper types. Many artists prefer to use the heavy class, is one of the pastel paper. Since the oil pastels and pigments on the surface are kept to a scratchy. He raised some cereal because ordinary oil paint on canvas choose - perfect for making the capture of oil pastel paint. Some other options paper, canvas, paper archiving, warm and cold-pressed paper, emery paper.
Third step: Figure Sketching
The times are in place for paper and pastel, drawing, painting can begin. Your strokes, pressure and roughness of the canvas to keep in mind before drawing are the two most important things. It will decide the intensity of colors in order to use pressure. More pressure, more intense colors, and vice versa employment. Similarly, the screen is less than a smooth surface against the eye results in a rough surface damaged.
Canvas on paper, a pencil sketch you start your drawing. With soft lines and print your drawing is not, why not, therefore, indent on the side. If the feeder and a later part of the paper is shaped depression takes time to paint, built-in component, so that irregular eye color to capture all the colors are not given. Read more drawing tips for beginners on.
Then, in a given area and sketch pencil lines, the color that you want to use determines about. Then fill the colors in all areas. After the first coat of paint on canvas, it becomes sled. Since seeing the film and looking for a light, transparent, and it may be possible through the canvas. However, is on canvas, this will be "transparent colors covered by successive layers.
Step Four: Layering
Start painting at any time before the final product had clearly no idea what to expect. Variety of techniques to create works of art that are using oil pastels. They are so useful for children, as is proved oil pastel techniques in order to perfect for beginners is easy:
Different sounds
Levels in different ways, or light on the light-dark colors or dark can be added by the addition of. However, it is easier to give a dark to light again the difference is not the other way. This is a pastel painting that does not contain any spaces give the whitest of whites think that is easily felt.
Using this site
Cover chalk, pastel, and a broader canvas, so that it creates a disjointed effect, without the Amalgamated feel protected.
Using linear Strokes
Linear Stroke (line) to draw outlines, add details to the engraving and marking (drawing lines, in particular, parallel hatching) can be used and hatching. This allows better control shape and color saturation.
Even Tone
If a particular area that you want to keep dark or too light, even necessary, to obtain a solid upright. In this case, dark colors with lighter ones, or vice versa should not be dyed. The color of the sound should be like them.
Turpentine
Turpentine is used to attenuate or paint flat. Thus, if a mixture of pastel on paper that is needed is oil pastel is very soft and when you dive turpentine begins to melt. Sun can be manipulated depending on the desired density. Alternatively, the tip of a brush can of turpentine and pigments on canvas is used to be dipped Drag - This is educate themselves. Equally it can be washed repeatedly generated in this way. The intensity of the colors used by the change in the amount of turpentine can be so varied.
"Sgraffito" effect
"Sgraffito" an effective way so that it is under the top layer of paint color will be itching. This is clearly "indicates zero. To do this is, a razor, knife or brush to be used the other end.
Effect ghostly
Look ill with a razor blade like a ghost or an image is seen in areas. Sometimes several layers of help and a very heavy pitch, they can be solved with this technique.
Swabs
If an added layer upon layer, it can look too broken. To solve this, is a mixture of different layers, use a cotton swab or your finger. It feels very healthy and then die.
Too many levels of correction
Adding too many layers of images () surface more pastel canvas muddying grabber can incapacitate make. In this case, the case may wind up a finger around the affected area and then wipe dry cloth.
One must then be allowed, painting was completed harden. If it is used will depend on the number of layers of paint made for hardening. The life of the table can be extended by adding a fixative. In addition, spacer mat so that can be added without affecting the Pastel painting under glass.